In part 1 we looked at the settings in the client for getting the highest possible quality of the photos. Now we have to get them on the harddrive for further work. I take my photos using the shortcut
shift-cmd-S on my Mac. On the PC you will use the shortcut
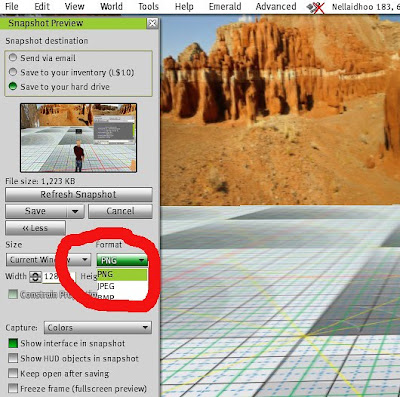
Ctrl-Shift-S. Look in the image below how to set the default settings in the menu for what will happend when you take a new snapshot using this shortcuts.
The important part is in the red ring in the top "
Save to your harddrive". Click on the down arrow to the right of the Save button and then click on the "
Save as" button (marked with the lower red ring in the image above).
Here you want to select a unique folder for your SL snapshots. Believe or not but my folders are named Images -> SL -> Snapshots and here all my photos will end up when I take them. The important part here is to use a non-destructive non-compression format. OK your files will be bigger but so much better so
DON'T USE JPG's. I have to stress how important this is for the quality of your photos as if you import then in Photoshop or the Gimp for example, edit them, and save them back in JPG the will be compressed (and partly destroyed) first when you save them form SL, then a second time when you save them from Photoshop or The Gimp, and lastly a third time when you upload them to SL, Flickr or your Blog. Every compression to jpg destroys your photo a little bit, how much is depending on the compression settings. So don't use a destructive compression format until the last action in your workflow. I prefer to use the png format. In the image below you can see this settings in the red ring.
You will probably think these files are a bit big, especially if you take lots of snapshots inworld. I am a photographer in RL too so I have the habit to take huge amount of photos. In RL they are in RAW format (huge) and in SL they are in png format (a lot bigger than jpg's). So the important thing here is to be decisive and select the few really great ones and be cold hearted enough to erase all the others. When I have done a photo session I move the few good ones to a folder named Selected and then erase all others in the Snapshot folder.


No comments:
Post a Comment