Thursday, October 29, 2009

HiQ photography in SL, Part 4: Edit with Gimp, the cheap way

Many people don't have the funds necessary for buying Photoshop and end up using a cracked (and possibly infected) illegal copy or some really bad editing solutions.

However there is a completely legal and really good quality alternative available for you. This article tries to recreate the workflow I showed in an earlier article about working with Photoshop but with this alternative instead.


The Gimp is a free (as in no cost) open source tool very similar to Photoshop and you can do almost anything you can with Photoshop in in a similar way. It also has the same kind of tools and is organized in the same way. With the proper training you can achieve the same quality with a program that costs...... nothing more than your effort.

There are versions for Windows, Mac OSX and Linux and translations exists for many languages... like my native Swedish (and that you will see in the screenshots below). You can download it here:
http://www.gimp.org/


If you are used to Photoshop you will find the the default shortcuts rather different. However that is no problem as you can set your own shortcuts for almost anything in the program. Look above to see the menu for that. I find it easy to search for a tool in that settings instead of digging for it. I have set my most used Photoshop shortcuts to be the same in The Gimp like:

Resize: alt + cmd + S
Layers: cmd + L
Contrast: cmd + K
Saturation: cmd + U
Brush tool: B
Crop tool: C
and so on......

In the rest of the article I will use those shortcuts above, but if you do not change them they will be completely different.

My workflow is like this:

1. Open the file in The Gimp.

Never make a photo bigger without special tools for that, because it will degrade horrible. There are plugins and other tools to do that because it needs to interpolate the new pixels, but these tools are rather expensive. So best is only to keep pictures at the original size or to make them smaller.

2. Start with crop. Shortcut = C. Hold down and drag with the mouse to get an even square if you plan to post at flickr, because square photos looks best there. Press enter when you have the right size of your crop.

If you plan to use them in your profile... have a look at this page for details: http://wiki.secondlife.com/wiki/Limits

3.Look under Textures on that page, for the correct proportions for picks and profile. There is video for showing how to do that in photoshop. Look at the video a bit down on that page.

4. Set the levels if the important part are too dark. Ctrl-L (CMD-L on Mac) opens the Levels tool. Often there is no info staples at the rightmost part like in this image. The photo is badly exposed in photo language. If so drag the rightmost handle to the left until it touches the staples of black.

I hope you see the difference between those two images. I happens quite often that SL photos gets this way and are wrongly exposed in my opinion. Now you know the trick to fix that...  ;-)

Sometimes you have staples to the right but it still looks to dark, then you can try to move the middle handle to get it to look right.


5. I think it is almost always necessary to increase saturation in the images from SL.
Ctrl-U (CMD-U on the Mac) opens the Saturation tool. For me it is often +15 increase or so.

As you see I have a Swedish version of The Gimp, but I think you will be able to find the right spot in your version of The Gimp despite that.


6. Make the final size. I normally choose 800 or 600 pixel at the longest size, that works good on Flickr and blog sites. If it is already smaller then that's so... just leave it. Never make a photo bigger without special tools. Use the shortcuts CMD-ALT-S on Mac (I think it is Ctrl-alt-S on PC).

Now be sure that the link tool (marked by the arrow here) is turned on so that the proportions dont gets changed. Then enter 700 in the example above in the field with the highest number).


7. Sharpen it. This is always the final step and must be done after the photo is in its final size. Use the built-in unsharp mask filter for this. There are also some more advanced and free plugins for The Gimp and you will find them on the links above.


Settings: Amount=0.50 (if you get white borders like sugar crust at hight contrast areas, then lower to 0.4),  Radius= 5.0, Treshold= 0...... thats it.

8. Save as: PNG (Use only JPG if you have to make them smaller in filesize for some reasob).

Voila! You are done....

Now the next time you are using the free Gimp instead of expensive Photoshop or some really bad tool... think a nice thought about me...   ;o)

Ben

Monday, October 26, 2009

Moving.... to a new paradise and escaping misery

When real life is as miserable as it is right now for me, it is absolutely wonderful to be able to escape into the paradise we are creating for ourselves here in Tangelo. Things are really beginning to shape up and we have now done the waters and some planting.  So much fun work still needs to be done...


 Marlia bought us a new great spa instead of a normal house. I always have problems manoeuvring in small spaces so this kind of open places are perfect for me. If we want privacy we have the oriental palace in the sky.


There are so many great details in that palace, look at the frosted glass in the photo below... I am such a freak for details...   ;-)


At the moment Marlia and I are participating in the great Fairy Tale hunt. That is so much fun as you get to see so many new places and receive so many nice gifts. Marlia is miles ahead of me... on one of the places she got this great drawing table. Just perfect for her..... she is a real drawing freak.


You can see the a part of the great Spa in the background here. The amazing woman there in the foreground is truly admirable for accepting moody me and my swings.


Another view of the spa...   looks nice... huh?

Thursday, October 22, 2009

Well... I couldnt let go of that thought...

So we decided to move from Otherland to Fruit islands when we found the perfect place out there...  ;o)
So perfect, no lag, lots of prims, great sailing, beautiful surroundings and some really wonderful people. I even met some people I knew when I lived in the New England sims out in Nantucket, back in the "old days". It seems people are moving from Nantucket to Fruit island....


This is what our islands looked like we we found them. Totally empty without any vegetation but lying in just the perfect place.


The islands needed almost no terraforming so the minor adjustments was done rather swiftly and then we can concentrate and what we would like the place out there to be like. Even if we have the palace in the sky we need a small house done here and the proper vegetation for all the animals and birds...


Here the terraforming is done and we just have the big yacht there for sailing around among those beautiful waters and participation in all the amazing events out there.

We will move out there rather gradual as we still have the old place in Otherland and need to figure out how to plan things. There we have three different layers in the sky. The oriental palace, the photo studio in a Holodeck and the building place and Xstreet shop. Maybe there is a better way to organize all that... ;-)

Wednesday, October 14, 2009

Exploring Fruit Island

Fruit islands is an amazing part of the sailing world in SL


This amazing tropical world consists of more than 70 connected sims. There is over 250 islands for rent and as they are rather small there is lots of free water for sailing.


Fruit islands is one of the communities that arranges the big regattas in SL and as the sim crossing often are quite smooth, it is really perfect for sailing or flying out there.


But besides all that residential areas there is also more than 30 public open places that are just waiting for exploration.


Below this wonderful lighthouse a beautiful under water world unfolds. Take the sub there if you get tired of all the swimming because the reef is enormous and continues over several sims.


So many places to explore in this amazing creation. This is from one of the secret cave, with fishing Herons and all. I just love it!


But beware of the traps if you bring your beloved like I did....   ;-)
At least if your loved one are as playful as mine is......  LOL

HiQ photography in SL, Part 5: Environment settings

In the three earlier parts I have tried to describe the things in a photo you can affect with settings in the SL client or in the afterwork in Photoshop. But sometimes you can also change the condition for a photo to make it look better.

1. The aspect, view of angle, composition are traditional photographic subjects that you can read about in any book or web site about photography. I will in a later post try to spread some lights over the SL specific things here.

2. Environment, lightning and so on. There are two different aspects to this. First you can add artificial lightning with lamps and other lightsources in world. The next post will cover that and some neat tools for making better portraits.

But now i will try to show how you can affect a photo by using the environment editor i the SL client. Have a look at the photo below:


It is a nice photo of an octopus from the great underwater world in the Fruit sims. However you cant se much of the surroundings because of the light of that time of SL day. That is an easy fix..  ;-).

Just bring up the environment editor in your SL client. Use the World menu -> Environment -> Environment editor, and you get the little windows in the top of these images.


The top left slider just changes the time of day. Just try to drag it and adjust so you get the right color and direction of light. In this example I also changed the Water fog slider to the lower right side of the window and the Water color. Just experiment until you get the right impression for your purpose.

Monday, October 12, 2009

First steps in scripting....

I started out a few weeks ago to learn about scripting. I am an experienced programmer in RL even if it was a few years ago since i did any major work. I have experience with C, C++, PHP and so on so i guess that makes the understanding a bit more easy. But LSL works a bit different and I had some problems getting the hang of it until i found some great resources. That is why I thought somebody else might be interested in them.

First of all:

This is the College of scripting, music and science.... the best starting point for learning about scripting. They have the walls full of very pedagogic and instructive screens. Look at this for example:

 
Be prepared that the center is huge with many floors.... Marlia bought one of the books there and has rezzed it on our building platform for easy refeerence when we are experimenting, building and scripting. So nice of her...   ;-)


I also found a few places with free and open scripts. For me it as been useful to try those scripts, try to understand them an maybe use them as a starting point for my own creations.


Free script library is maybe the best place to try.


But SL free script library is also useful. Some of the scripts are the same but some are unique.

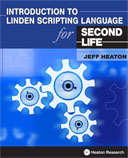
Lastly I bought a PDF-book on Xstreet to read on all my travels. Here you find some info about it: